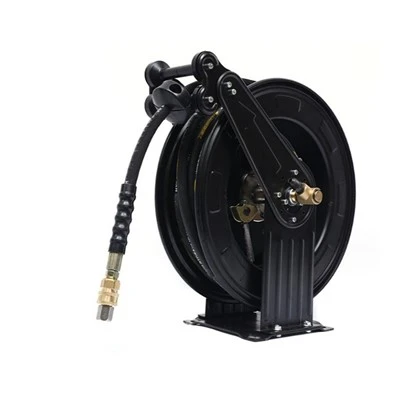
Hey there! As a hose reel supplier, I've seen firsthand how a well - mounted floor - mounted hose reel can make a world of difference in your workspace. Whether you're using it for industrial cleaning, automotive maintenance, or just around the house, getting that hose reel properly installed is key. So, let's dive into how to mount a floor - mounted hose reel.
Step 1: Choose the Right Location
First things first, you gotta pick the perfect spot for your hose reel. Think about where you'll be using the hose most often. If it's for a car wash, you might want to place it near the water source and the area where you clean your vehicles. For an industrial setting, consider the workflow and make sure it won't get in the way of other equipment or traffic.
The location should also be on a flat and stable surface. Uneven floors can cause the hose reel to wobble or even tip over, which is not only dangerous but can also damage the reel and the hose. A concrete floor is usually a great choice, but if you have a wooden floor, make sure it's strong enough to support the weight of the reel and the hose when it's full.
Step 2: Gather Your Tools
Once you've found the right location, it's time to gather the tools you'll need. You'll typically need a drill, the right drill bits for the type of floor you're working on (for concrete, you'll need a masonry bit), a wrench, and the mounting hardware that came with your hose reel. Most floor - mounted hose reels come with bolts and washers for installation.
It's also a good idea to have a measuring tape on hand. You'll need to measure the distance between the mounting holes on the hose reel and mark the corresponding spots on the floor. This will ensure that the reel is installed straight and level.
Step 3: Mark the Mounting Holes
Using your measuring tape, measure the distance between the mounting holes on the bottom of the hose reel. Then, transfer these measurements to the floor at the chosen location. You can use a pencil or a marker to mark the spots. Make sure the marks are clear and accurate, as this is crucial for a proper installation.
Double - check the alignment of the marks. You want the hose reel to be centered and straight. If you're installing multiple hose reels, make sure they're evenly spaced and parallel to each other.
Step 4: Drill the Holes
Now it's time to drill the holes in the floor. If you're working on a concrete floor, start with a small pilot hole using the masonry bit. This will help guide the larger bit and prevent it from wandering. Once you've drilled the pilot holes, switch to the larger bit and drill the holes to the appropriate depth.
For a wooden floor, you can use a regular drill bit. Make sure the holes are slightly smaller than the diameter of the bolts to ensure a tight fit. After drilling the holes, clean out any debris or dust from the holes. This will help the bolts seat properly.
Step 5: Install the Mounting Hardware
Take the bolts and washers that came with your hose reel and insert them into the holes you just drilled. Make sure the washers are placed under the heads of the bolts to prevent them from digging into the floor. Tighten the bolts using a wrench, but be careful not to overtighten them. Overtightening can damage the floor or the mounting hardware.
Once the bolts are tightened, place the hose reel on top of the mounting hardware. Align the holes in the reel with the bolts and slide the reel down onto the bolts. Then, add the nuts on top of the bolts and tighten them using the wrench. Again, make sure not to overtighten.
Step 6: Check the Stability
After installing the hose reel, give it a good shake to check its stability. It should be firmly attached to the floor and not wobble or move. If you notice any movement, check the bolts and nuts to make sure they're tightened properly. You may need to adjust them or add some additional washers for a better fit.
Step 7: Connect the Hose
Now that your hose reel is securely mounted, it's time to connect the hose. Most floor - mounted hose reels have a connection point for the hose. Make sure the connection is tight and leak - free. You can use a hose clamp to secure the hose to the reel if necessary.
Once the hose is connected, test it by turning on the water source. Check for any leaks or kinks in the hose. If you find any issues, fix them before using the hose reel regularly.


Why Choose Our Hose Reels?
At our company, we offer high - quality hose reels that are built to last. Our High Pressure Washing Hose Reel is designed for heavy - duty use and can withstand high pressure. It's made from durable materials that are resistant to corrosion and wear, ensuring a long service life.
Our hose reels also come with easy - to - follow installation instructions, so you can mount them with confidence. And if you have any questions or need help during the installation process, our customer support team is always here to assist you.
Contact Us for Purchasing
If you're interested in purchasing a floor - mounted hose reel or any of our other products, don't hesitate to reach out to us. We're happy to discuss your specific needs and provide you with a quote. Whether you're a small business owner or a large industrial facility, we have the right hose reel for you.
References
- "Hose Reel Installation Guide" - Industry Standards Publication
- "Best Practices for Mounting Industrial Equipment" - Engineering Journal